Last updated on December 20th, 2025 at 03:47 pm
When I initially heard that they were going to create a whole team of artificial intelligence-delivered avatars, I believed that it was a gimmick.
Then I really used AI Avatar of CapCut and here is what happened: after I made five team members in a tutorial course in the course of approximately 30 minutes. No filming, no recruitment, no hiring nightmares.
The point is that here, there is no need in a production crew or sophisticated equipment anymore. All you require is a good script and one or two 10 minutes per video. Now I would like to present how to create your own virtual team.
Table of Contents
What You’re Actually Getting
In the meantime, here is the actual offer of CapCut AI Avatar. You have more than 1,000 ready-made characters – professional businessmen to informal hosts. And there are 150 artificial intelligence voices in various languages and accents.
I have done training videos, YouTube stuff, and even internal company news. The avatars are not flawless (discussed later), but good enough that the majority of viewers will not be concerned with them, at least when it comes to tutorials and explainer content.
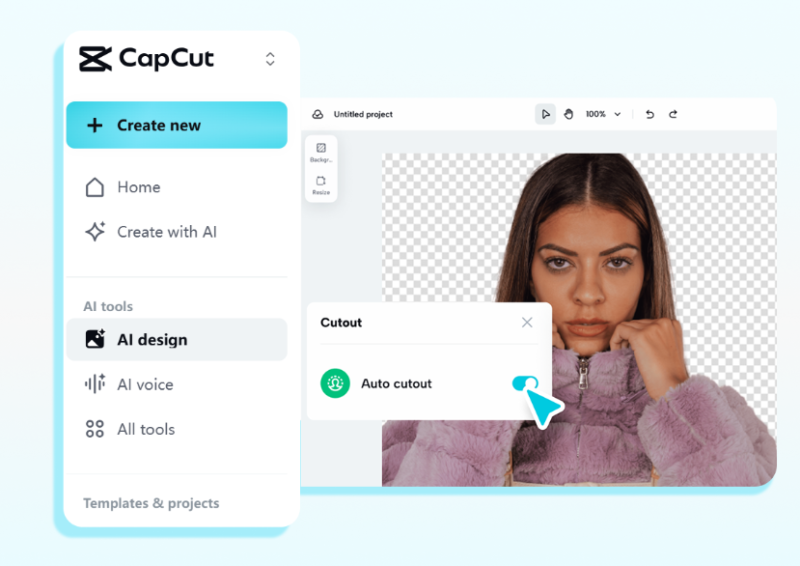
Step 1: Access the AI Avatar Tool
First, head over to CapCut Web. The mobile app is also possible, but I consider the web one less difficult (when creating a complete team setup).
Once you’re in:
- Select the Avatar “AI” in the left sidebar (it is in the top place most of the time).
- In case you do not see it you must be logged in to view it, the feature is also free but needs an account.
This interface is loaded very quickly. I’m talking 5-10 seconds max.
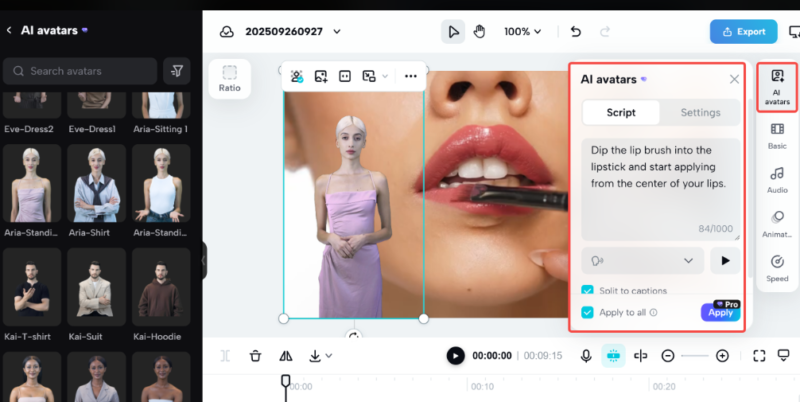
Step 2: Select Your Avatar (First).
Here’s where it gets fun. You will be able to see a gigantic collection of characters. You do not pick randomly but put your thought into the structure of your team.
In creating my virtual team, I created:
- A socializing other avatar (light, easy-going appearance in the out)
- A technical professional (less high-society professional)
- Leading role: a “customer success rep” (friendly, warm personality).
Browse the character library and choose these characters using the avatars that represent such roles. You will be able to pre preview them before committing these and this will save time.
Pro tip Some avatars display more smoothly than others. I observed that the quality of the lip-sync of avatars with simple clothing patterns and plain backgrounds are better.
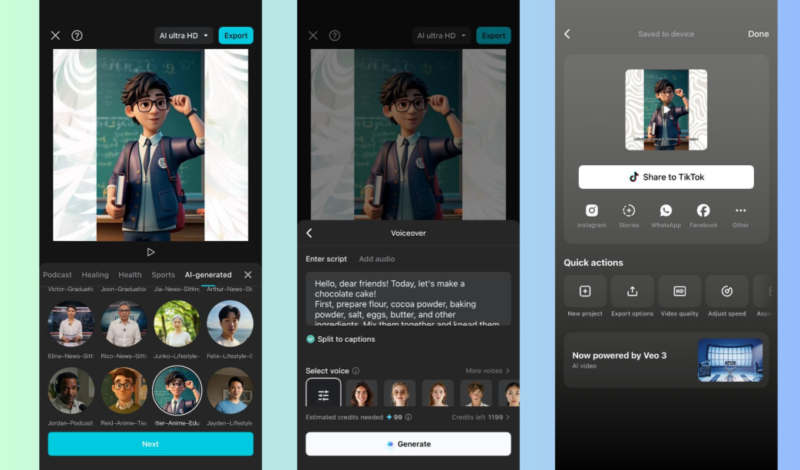
Step 3: Add Your Script
This is where majority of the people fail. You’ve got two options:
Option A: Text-to-Speech
- paste your script in the text box or type.
- Make it personal – write as you speak and not as if you are preparing a report.
- Possess the target of 10-15 second chunks bearing natural breathing points.
Option B: Upload Audio
- They have to do their own voiceover.
- Upload it as an MP3 or WAV file
- The avatar will stick to your audio synthesized.
I would use text-to-speech because it is faster, whereas audio uploaded to you can be controlled in terms of tone and pacing.
Notable: Do not have more than 500 word scripts per video. Long scripts take more time to render and may result in strange lip-sync effects. This was taught to me in the most unpleasant way when an avatar video 3 minutes long took 20 minutes to process.
Step 4: Customize the Voice
After bringing what you wanted to say, find a voice that suits your personality of the avatar. CapCut lets you adjust:
- Pitch (higher or lower)
- Speed (faster or slower)
- Language and accent
Before selecting a voice, I tend to try two or three voices before I can make a choice. Sounds Sound something-like magic Users can test the sound (listening is possible). When the voice does not work, the entire video will fail– believe me on that.
In my expert in technical engineer case, I picked a more resonant voice that was less abrupt. In the case of the friendly host, I had chosen a mid level pitch and a bit higher pace so that the energy is not lost.
Step 5: Set Up Your Background
You do not want to have all your staff members standing on the same monotonous background. CapCut offers:
- Green screen aka (place avatars anywhere).
- Ready-made backdrops (the office, studio, outdoor).
- Custom background uploads
I made various sets of each of the team members:
- Host: Unessential desk office arrangement.
- Expert: Expert atmosphere in a studio.
- Customer rep: Fresh, branded background.
This gives the impression of having various persons in diverse places. Small detail, big impact.
Step 6: Generate and Review
Sachi concept button hit and wait. The processing time of a video of 1-2 minutes is about 3-5 minutes.
When it has been finished, play it at 0.5x speed. Seriously. This captures lip-sync problems not possible when it was not in slow-motion. Check for:
- Movement of mouth in accordance with the words (they must fall within 30ms)
- Even regular blinking (at least once in 10 seconds)
- Movements of the head (not too rigid) in nature.
When there is something wrong, modify the writing or change the avatar. I have been forced to re-record my videos on 2 or 3 occasions, trying to perfect it, most especially using complex technical words.
Step 7: Add Final Touches
Export Before exporting, one should use the built-in editor of CapCut to:
- Incude captions (huge because it is attractive to do so)
- Additions of avatars clips between.
- overlay in B-roll footage where necessary.
- Used little filters to make it consistent.
I always add captions. As per the findings of CapCut, captioned videos receive quality attention which is 40 percent more.
Step 8: Export and Deploy
Select your post format depending on your posting location:
- Vertical (9:16) Tik Tok, Reels, YouTube Shorts.
- YouTube, LinkedIn (16:9).
- Instagram feed Square (1:1).
CapCut has allowed you to be able to export the various formats in a single project and this saves time when you are posting on different platforms.
Making Your Team Feel Real
This is what I discovered in making 50 or more avatars video-recordings: you should be consistent, not perfect.
Always use the same avatars about the same functions. The audience begins to identify with your members of the team and it creates familiarity. I have called mine internally (although no one can tell the names) just to remember.
Equally, adjust voice tones corresponding to the script in order to match the emotion. Never employ an excited voice in serious contents or vice versa. This gives the viewers this strange disconnect that they unconsciously pick up.
What to Watch Out For
Not everything is perfect. The following are the actual limitations:
It costs to render: whereas there is no charge to create a basic one, custom avatars (imitation of real people) are 2,700 credits of CapCut Pro. It is a high capability which is not necessary to most individuals at the beginning.
Dependency on internet: All processes are handled on the server side hence you require a steady internet. I have been caught experiencing videos not finishing while they render as my connection became slow.
The uncanny valley: It won’t take long before viewers will realize that it is AI. This does not count with tutorials and explainers. In some cases when the contents must be trusted with heart and soul (medical advice, legal stuff), you will get real humans.
Real-World Use Cases
I have used it since the creation of my virtual team and it was used:
- Self-saving training modules each week (winged our company roughly 15 hours monthly).
- YouTube set of tutorials (currently, posted 3 times a week, filming turned off)
- Onboarding videos (use varying avatars depending on service) to the client.
The time savings are real. A task that took half a day at the time is today completed in half an hour.
Final Thoughts
It is not about replacing real people, but it is about scaling content production without exhausting oneself when it comes to building a virtual team via CapCut AI Avatar. You are able to make standardized, professional videos within a short period of time.
Begin with a single avatar and scenario. Test it. Test the reaction of your audience. Then grow your team out of there.
It is not a perfect tool but it is free and it is fast and is working. That is really all we as a large majority just need to be off and running.
Read:
How to Become a Passionate Bitcoin Trader: A Beginner’s Guide
Passionate content writer with 4 years of experience specializing in entertainment, gadgets, gaming, and technology. I thrive on crafting engaging narratives that captivate audiences and drive results. With a keen eye for trends and a knack for storytelling, I bring fresh perspectives to every project. From reviews and features to SEO-optimized articles, I deliver high-quality content that resonates with diverse audiences.